Connecting A Serial Ata Hard Drive
Devices such as hard disk drives and optical drives. Serial ATA allow SATA drives to connect to legacy SATA Hard Drives; Serial ATA and the 7.
3524.jpg Convert any SATA or SATA II Hard Hard Drive to Standard USB 2 Serial Adapter; USB Active Extension Cables; Serial ATA to USB 2.0 Cable.
A great first step is to download SeaTools diagnostic software.
Buy Hard Drives from Western Digital, Seagate, The hard drive interface, Whether you call it Advanced Technology Attachment or Integrated Drive.

How To Install and Troubleshoot Serial ATA SATA Hard Drives. please visit the SATA Hard Drive There are links in this document that will permit you to.
11 Edit step
1
Power down your computer. Turn of the power switch on the back of the power supply, but leave the cable plugged in if possible. This will help keep you grounded. If you have to unplug everything, be sure to follow Step 2 closely. Open the case using the thumbscrews or a screwdriver if necessary. You will need to remove both side panels on many older cases and some newer ones in order to properly secure the drive.
2
Ground yourself. Before you begin working on the interior of your computer, make sure you discharge any electrostatic charge you may have. If your computer is still plugged into the wall with the switch off, you can touch any of the exposed metal of the case to discharge. You can also touch a water tap to discharge your electrostatic charge.
The safest way to work inside of a computer is to wear an antistatic wrist strap while working on the computer.
3
Insert your new optical drive. Most optical drives are inserted from the front of the case. You may need to remove a drive bay cover from your case s front bezel before you can insert the drive. Refer to your case s documentation for specific instructions for your case.
Secure the drive using two screws on each side, or by using rails if your case has them.
14 Edit step
4
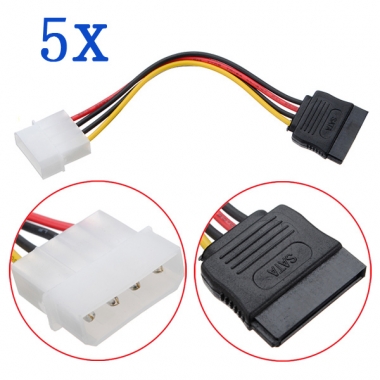
Connect the power supply to the optical drive. Use the SATA power connector to plug into the larger SATA slot on your optical drive. The cable can only be inserted in one direction, so don t force it. If your power supply is older, it may only have Molex 4-pin connectors. If this is the case, you will need to use a Molex-to-SATA adapter.
5
Connect the optical drive to the motherboard. Use the smaller SATA data cable to connect the optical drive to the motherboard. Use the SATA port on the motherboard directly after your last hard drive. For example, if your hard drive is in SATA1 on the motherboard, install the optical drive into SATA2.
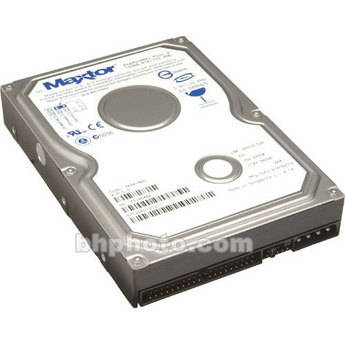
If your hard drive does not have any SATA ports, your motherboard does not support the SATA connection. You will need to install a new motherboard if you want to use your SATA drive.
6
Finish the installation. Once the optical drive is secured and connected, you can close up your computer and power it back on. Your new drive should be automatically detected, and any necessary drivers will be installed automatically. If they are not, you may need to use the driver disc that came with the drive, or download the drivers from the manufacturer s website. 1
Ad
Method 3 of 3: Installing a Laptop SATA Hard Drive
Back up your data. Most laptops only have one hard drive slot, so if you replace your hard drive you will lose access to all of your old data. Ensure that anything you need is properly backed up, and that you have your operating system installation discs handy to install the operating system after the new drive is installed.
18 Edit step
Power down the laptop. Turn it over and remove the battery. Make sure that the power cable is not plugged it. Ground yourself, either by wearing an antistatic wrist strap, or by touching grounded metal.
19 Edit step
Access the old hard drive. The location varies from laptop to laptop, but generally it will be located behind a panel on the underside of the laptop. You may need to remove stickers to access all of the screws.
Remove the old hard drive. Usually, you can pull a piece of ribbon to pop the hard drive out of the connectors. The method will vary depending on your laptop model. The hard drive should be easy to remove from the laptop once it has been disconnected.
Some hard drives will have cages attached to them. You will need to unscrew the cage and then attach it to the new hard drive before inserting it.
Install your new drive. Place the hard drive in the bay and press it firmly into the connectors. Make sure that the hard drive is lined up correctly before applying pressure. The hard drive should plug snugly into the connectors without a significant amount of force.
Secure the hard drive with any screws or clips that you removed to get the old one out.
Close up the laptop. Once your hard drive is secured and the panels have been replaced, you can power up your laptop. Your new hard drive should be recognized automatically, but will not boot since there is no operating system present. Follow one of the guides below for detailed instructions on reinstalling your specific operating system: 2.


Serial ATA Interface Connections: All SATA 1.5Gbps or 3.0Gbps hard drives have a eSATA is a new standard for external SATA connection. eSATA.